Share
I always enjoy watching and learning from other artists, so I've decided to share a bit about the process that goes into my painting. I don't use the same method in every painting; partly because the desired outcome can determine the method used to get there, and partly because I like to experiment. I say, "I wonder what would happen if I...." a LOT! I just finished a painting of a woman called "Odette" and took pictures at the end of each major step in the process. Here goes...
The first step is a rough sketch. I use this to map out body position and, to some extent, the light and shadows. I don't like to plan too much in a painting as I much prefer to throw general ideas out and see where they take me. I don't usually keep sketches since most of them are done on the backs of recycling on their way to the bin.
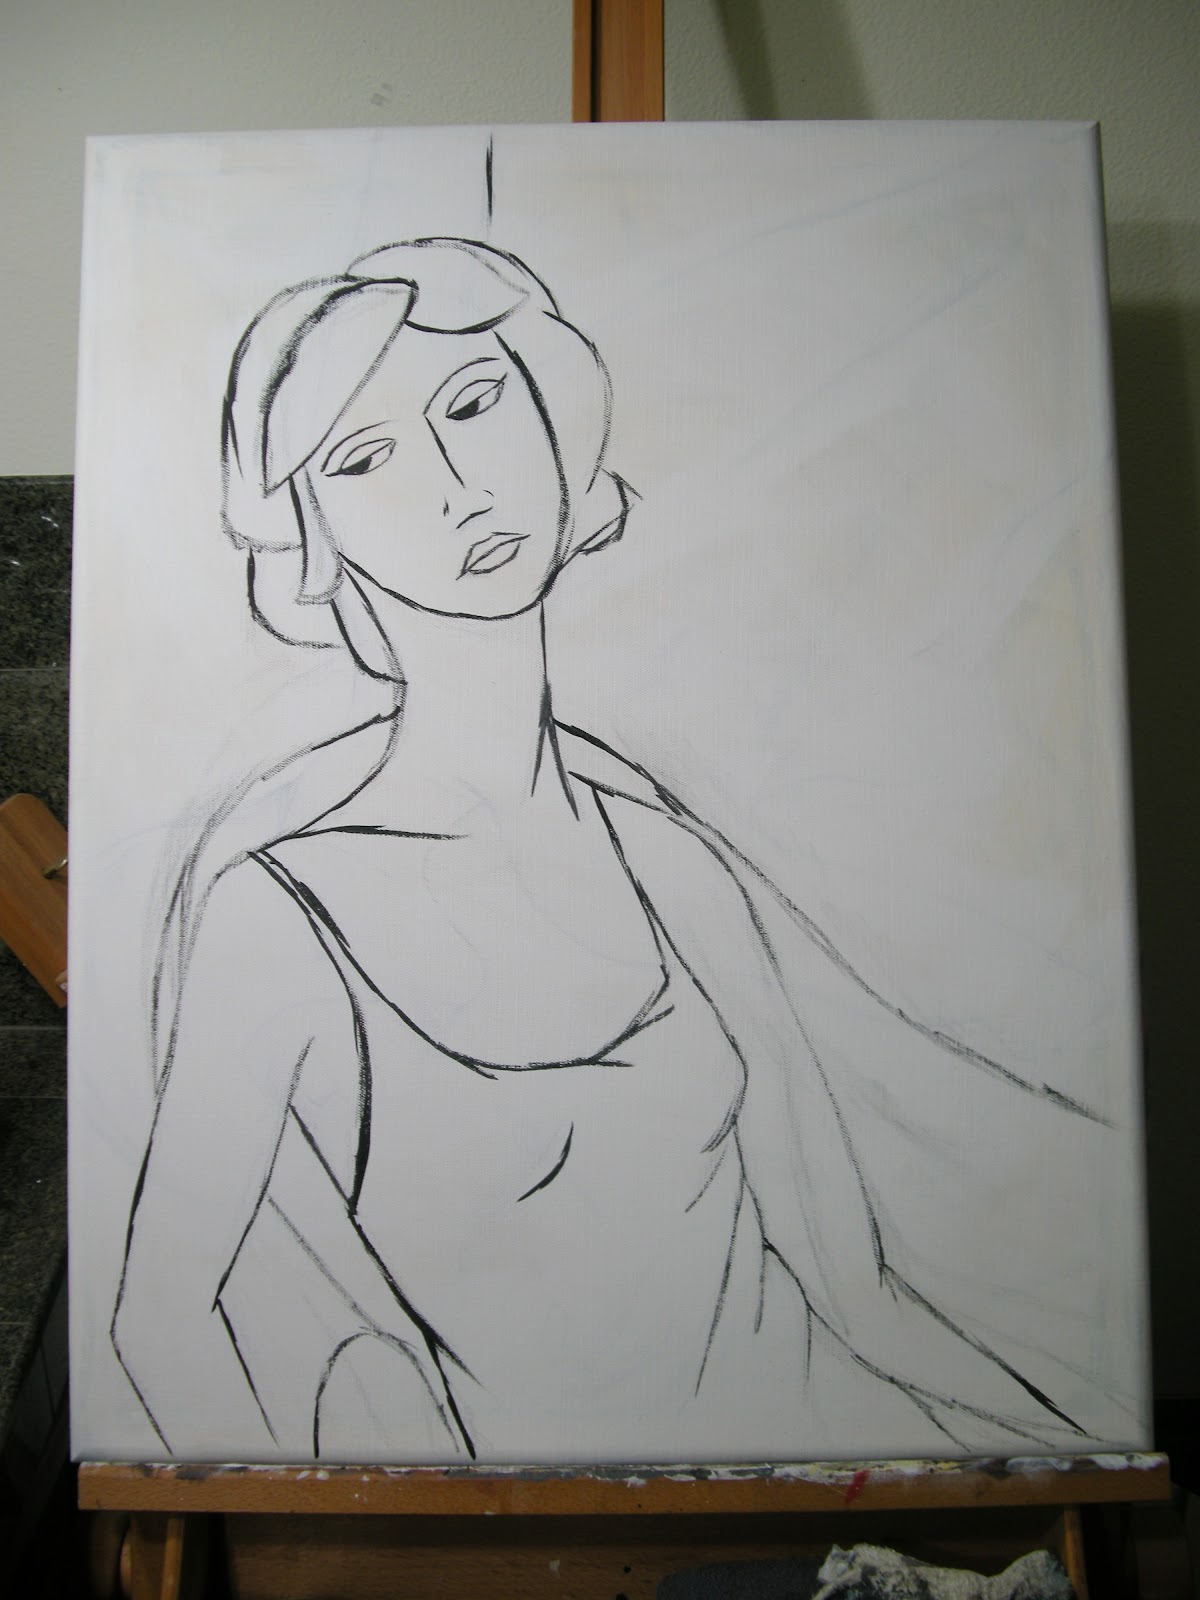
Next I sketch it out on the canvas (or whatever) first lightly in pencil, then in thinned black paint. I'll add or subtract elements at this point, such as the chair and wall corner seen here. At this stage I like to have the basic premise worked out but I'm still pretty non-committal about everything from color to details.
After that I put in the shading, I limit it to about 2-3 shades of gray plus basic black and white. This is a pretty important stage in the game. On the one hand, every single thing you see here will get covered in another few layers of paint. On the other hand, most of it will show through to some extent so it needs to be on target. This is usually where I start thinking of what colors to add where. I rely heavily on intuition and whim when making those decisions!

I like to keep my palette pretty limited so the whole piece feels congruent. I like a lot of contrast but find too many colors to be distracting. This, of course, is purely personal preference. When I looked at the expression on this woman's face I felt it showed a bit of sadness, a bit of boredom, and a bit of resignation. It called for cool, subdued colors so I chose muted purples and greens. Both background colors and her dress are all from the same base color, the differences were achieved by adding white or dark brown. You can see how the shading from the previous step is showing through this first layer of color.
This next step involves more color, usually just a second layer of a shade similar to that applied in the previous step. This is where I start adding in some of the lines lost after the first step. I do a lot of outlining and a lot of general scribbling to finish my work. I want those to be (and look) deliberate so they have to be applied toward the end.
The last step means it's finished.... and I'm not going to show that here! You'll have to check out the next post to
see the completed "Odette"!


No comments:
Post a Comment